Installing Kubernetes in VirtualBox
Get Kubernetes running in a VirtualBox Ubuntu VM with local access to the dashboards!
Installing Kubernetes for Ubuntu in Virtual Box
If you have found your way here then you likely want to play with this wonderful container management service that is Kubernetes. I wanted to experiment with K8s but I wanted to run it headless with access to the native dashboard which lead to a world of headaches and to this guide so hopefully I can save you all some headaches too.
VirtualBox Ubuntu Install
To start I will walk through some of the Ubuntu install as it is an important step to getting K8s installed.
First thing is to download an Ubuntu server image from here. For this I am using 18.04 LTS as it supports snaps which we will be using for installing Kubernetes.
After downloading it we will open up VirtualBox and create an image with the following settings.
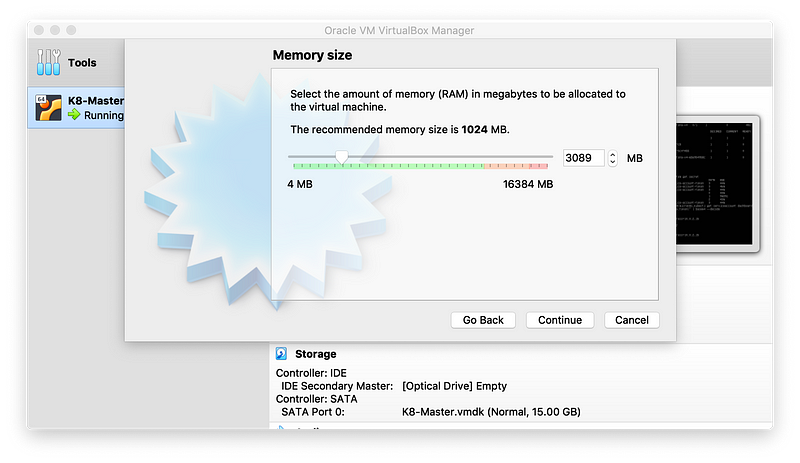
Next you will want to go ahead and allocate memory. I would recommend doing 3089 MB or more as the OS and basic install uses 2.32 GB.
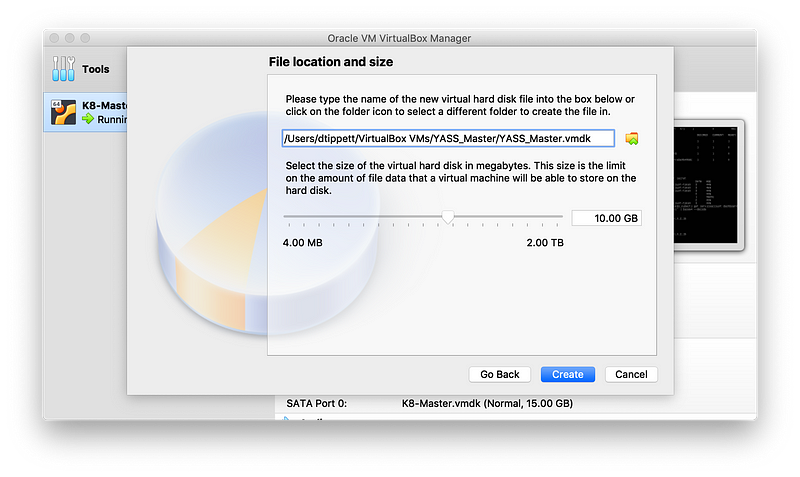
Also, I do recommend creating a virtual hard disk with VMDK with a fixed size. VMDK has really great portability and is not likely to corrupt from my experience. Creating it with a fixed size as well can save processing resources that can result from having a fragmented disk image. We will be using 10 GB which should be enough for our basic install and some experimenting.
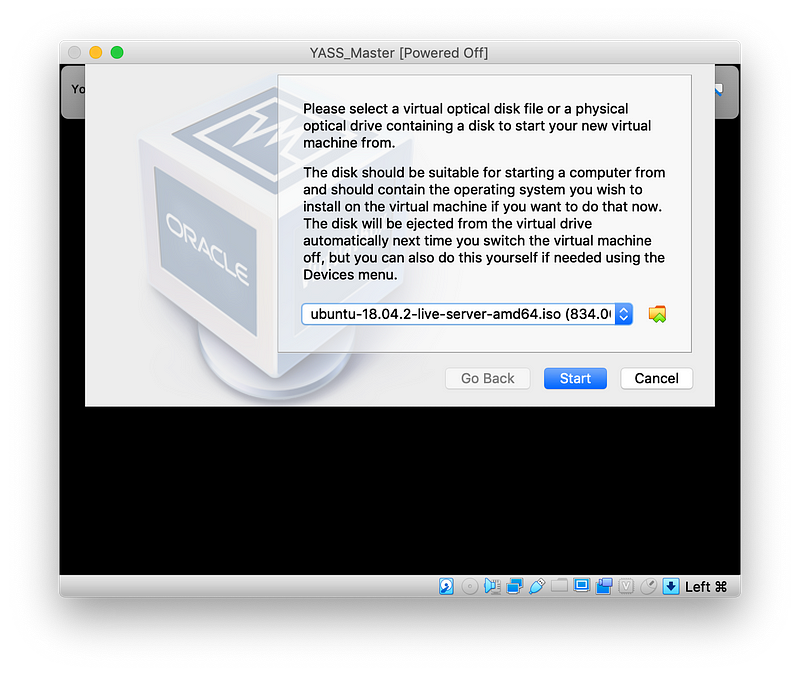
Now we will go ahead and click on our VirtualBox from the left bar and select start. We then select the Ubuntu iso from the box and start the VM.
For the first six steps of the install you should be good to just click enter through the options for language selection and networking interface as Ubuntu is able to detect them well. Step seven is a bit more involved but just make sure to remember the username and password for your install!
On step 10 we are going to enable OpenSSH server. For this you use the spacebar to select it, the tab to move through options, and the enter to submit.
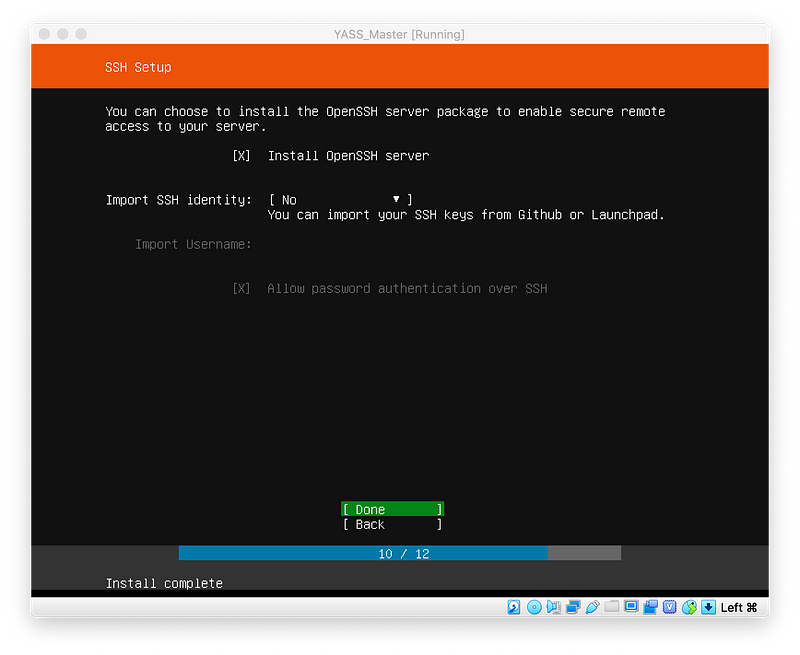
On this next screen we will be installing Microk8s (Ubuntu’s Kubernetes snap) and Docker. Again here you will use space to select, tab to navigate, and enter at the end to submit.
After this all the software will install and it will prompt us to reboot. Then we will login to the terminal with the credentials we created earlier. If it seems like it has frozen after logging you in try clicking enter. More often than not the terminal is waiting for input.
Setting Up Microk8s Kubernetes Environment
Now that we have setup Ubuntu we will go ahead and get our K8s environment going. We will start with enabling the dashboard and dns as they are great tools and required by some services. Use the following command to do so.
microk8s.enable dns dashboardThen we can use the following command to see if our services are running yet.
microk8s.kubectl get all --all-namespacesRouting for Microk8s Dashboard in VirtualBox
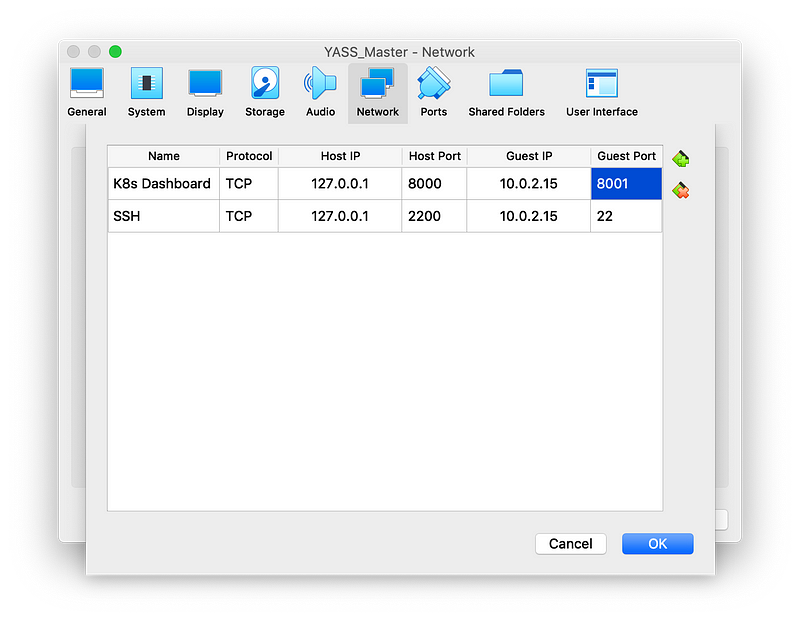
This was the part that caused the most problems for me as accessing the K8s Dashboard from a VM takes a few careful steps. First run the following command to get your current address (the first address).hostname -I
Once you have your address you can go to your VirtualBox window, select your VM -> Settings -> Network -> Advanced -> Port Forwarding. Here is where we will add some rules that will allow our computer to communicate with the virtual machine. For these you can copy the configuration I have setup (also if you prefer to use your local terminal like I do here you can configure your ssh rules). Use the ip that you found from using the hostname command in the Guest IP field.
After clicking okay to get out of the window you can use this command to find the access token for the dashboard (I ssh in from a local terminal because I typically paste this command in and it’s easier to do from there). This command goes through the kube-system get secret page looks for the entry that looks like “kubernetes-dashboard-token” and then requests its token all in one.microk8s.kubectl -n kube-system describe secret $(microk8s.kubectl -n kube-system get secret | grep kubernetes-dashboard-token | awk ‘{print $1}’) | grep ‘token:’ | awk -F “ “ ‘{print $2}’
Copy the token and set it aside for later. Now finally we will expose the dashboard to the outside world. This is done through the proxy command shown below. Use the address we found using the hostname -I command.microk8s.kubectl proxy --address=10.0.2.15
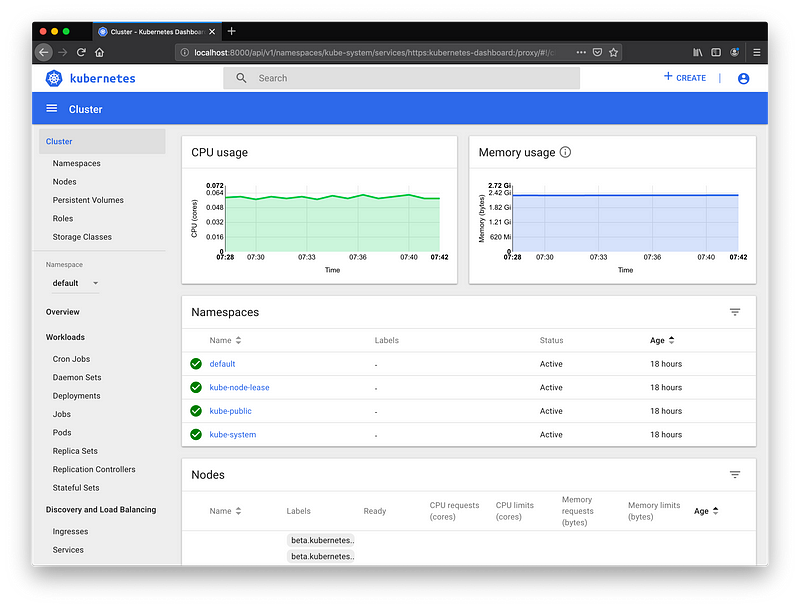
Finally you can open a browser on your local machine and enter the following address to access your dashboard.
http://localhost:8000/api/v1/namespaces/kube-system/services/https:kubernetes-dashboard:/proxy/
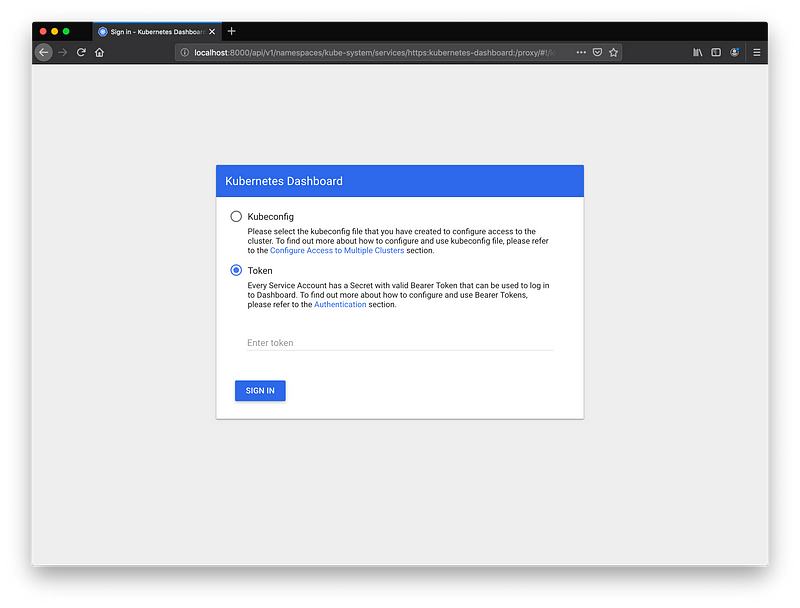
Select the token option for authentication; enter the token we saved earlier and enjoy playing with your Kubernetes master node! Shortly I will have a guide on how to cluster more than one VM.